
VMware allows you to install and run different guest operating system on your base machine. It is a kind of software implementation of a machine (i.e. a computer). If you want to migrate to another operating system and before moving to it you want to give it a try, then VMware is the tool that you need. It create a virtual environment within your base machine, where you can install a new operating system. You can also test beta softwares in your VMware machine. VMware has several advantages over different Virtual Machines like Microsoft Virtual PC, Microsoft Virtual Server 2005, Microsoft Hyper-V, Oracle Virtual Box etc. Unlike these Virtualization software it supports installation of both, Windows and unix/linux based Operating Systems. Again, another advantage is that, using VMware workstation you can run more than one virtual machines at the same time. There are many different versions of VMware. You can choose your desired version depending on your computing environment and needs. Here I am using VMware Workstation and installing Ubuntu 12.10 on it. Follow the steps below to know how to install any guest operating system on a host OS using VMware Workstation.
Steps to create virtual machines using VMware Workstation
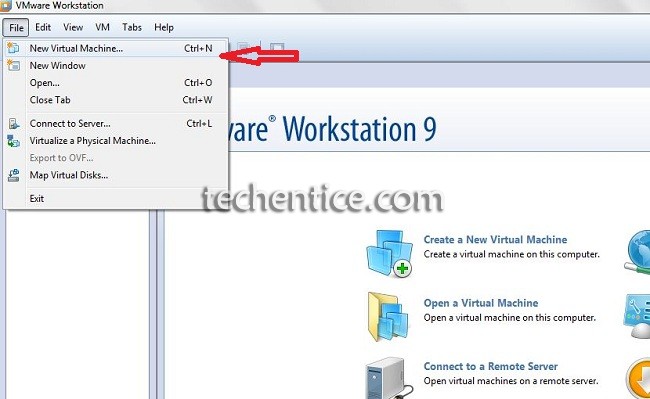
1. First of all install VMware Workstation and launch it.
2. Press Ctrl + N key or in the top menu select strong>File -> New Virtual Machine..
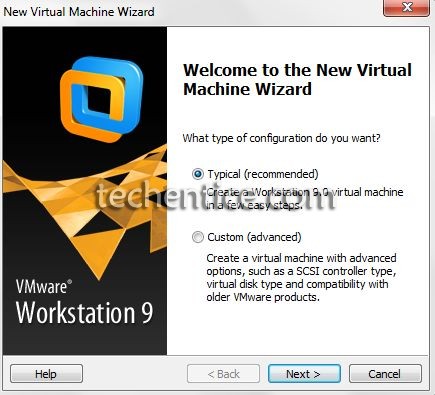
3. Now, Select the type of installation. Typical is recommended.
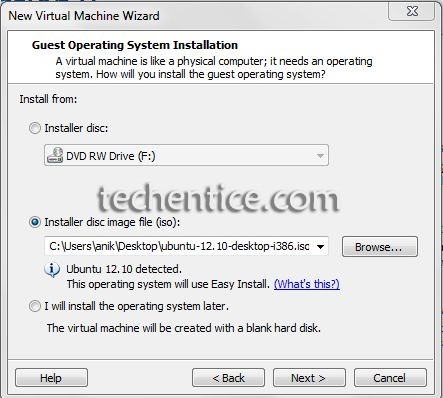
4. Next insert the set up disk of your OS and select Installer Disk option. If you have the .iso, .nrg or any image file of the operating system, then select Installer disk image file radio button then Browse and select the image file. You can even install the OS later, after creating your virtual machine. Click Next to proceed.
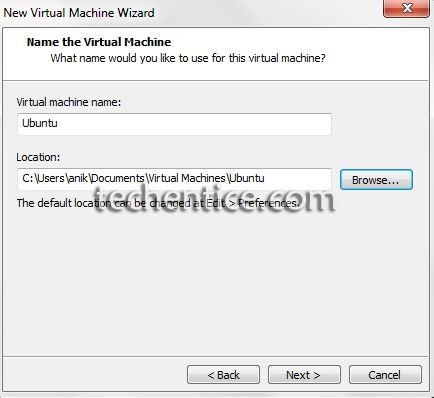
5. Select the location, where you want to store this virtual machine files. You can copy these files to any other machine and can continue your work. All settings and previously saved data will be available there. So, remember the location, where you are saving all these data.
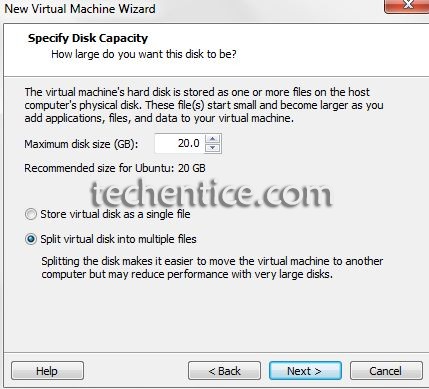
6. Then specify the disk capacity and select split virtual disk into multiple file option. Click on Next.
7. In the next step click on Customize Hardware button.
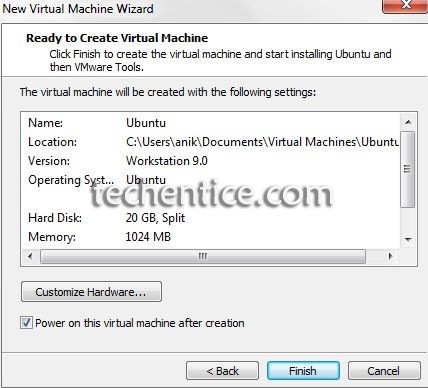
8. In Hardware Customization window, you can add or remove required or unnecessary devices, or you can increase or decrease Memory (RAM) for the OS that will be installed on this virtual machine. When you are done, click on Close.
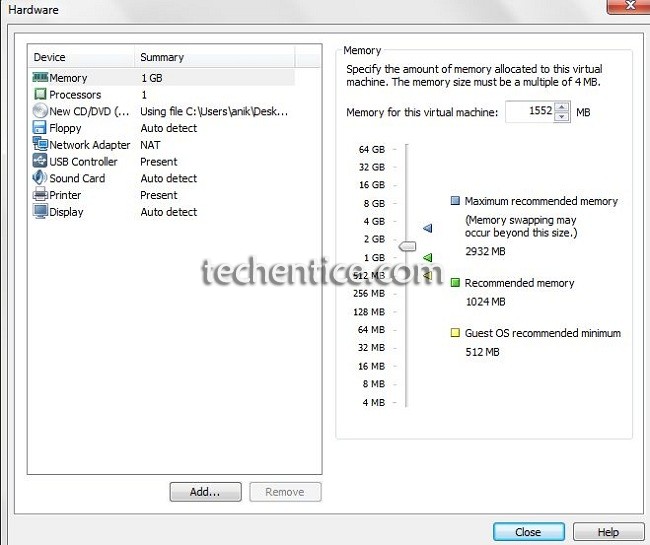
9. In Hardware Customization window, you can add or remove required or unnecessary devices, or you can increase or decrease Memory (RAM) for the OS that will be installed on this virtual machine. When you are done, click on Close. Then click on Finish
That’s it. Your Virtual machine has been configures properly. It should automatically turn on and it will start installing the Operating System. IF during the set up of the Virtual machine, you have unchecked the auto turn on after the set up is finished option, then you need to manually power on the virtual machine.