


Watermarks are applied on images to prevent copyright infringement. If you are a photographer, or a creator who share images on the internet, you must apply your watermark, so that others can’t claim your work to be theirs. So, it is important to recognize your work and prevent its authenticity.
There are many applications which can insert watermark on your photos. FastStone Image Viewer is a free utility tool, which is extremely useful for bloggers. In this article, I will show you how to insert Watermark on images in Batch in FastStone Image Viewer.
Steps To Insert Watermark On Images In Batch In FastStone Image Viewer
1. First download the .exe file of FastStone Image Viewer 7.5. After downloading, run the .exe file. This will initiate the installation process. Once installation is complete, launch the application. Then click on Tools and then click on Open Batch Convert/Rename Dialog.


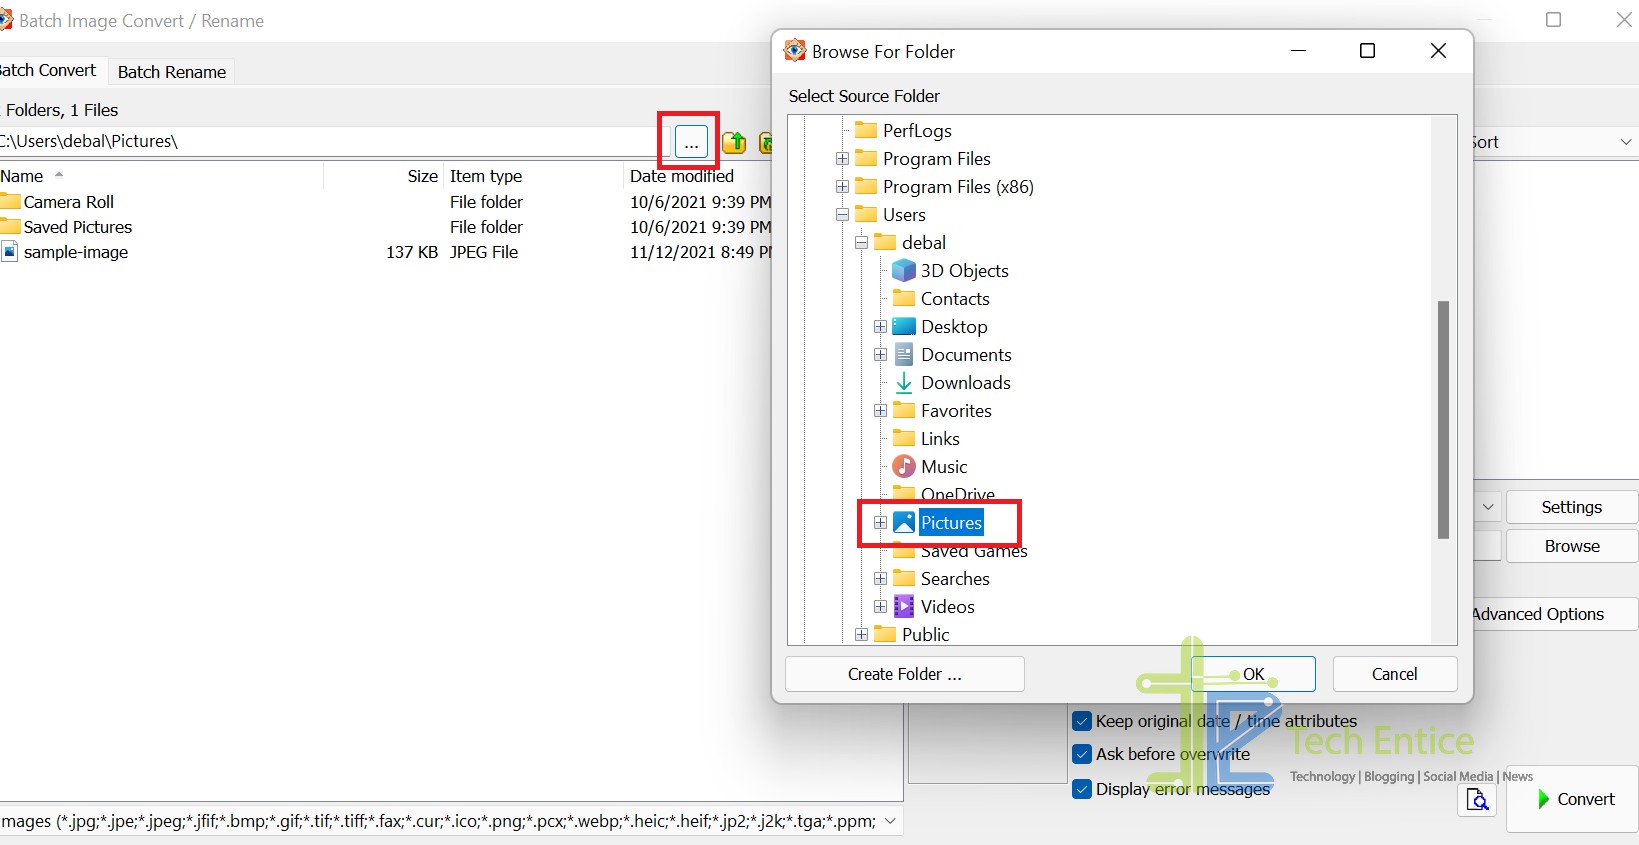
2. Now, load the images to convert in the left panel. Tap on the marked area in the left panel of the app screen. Navigate to the location and click on OK.

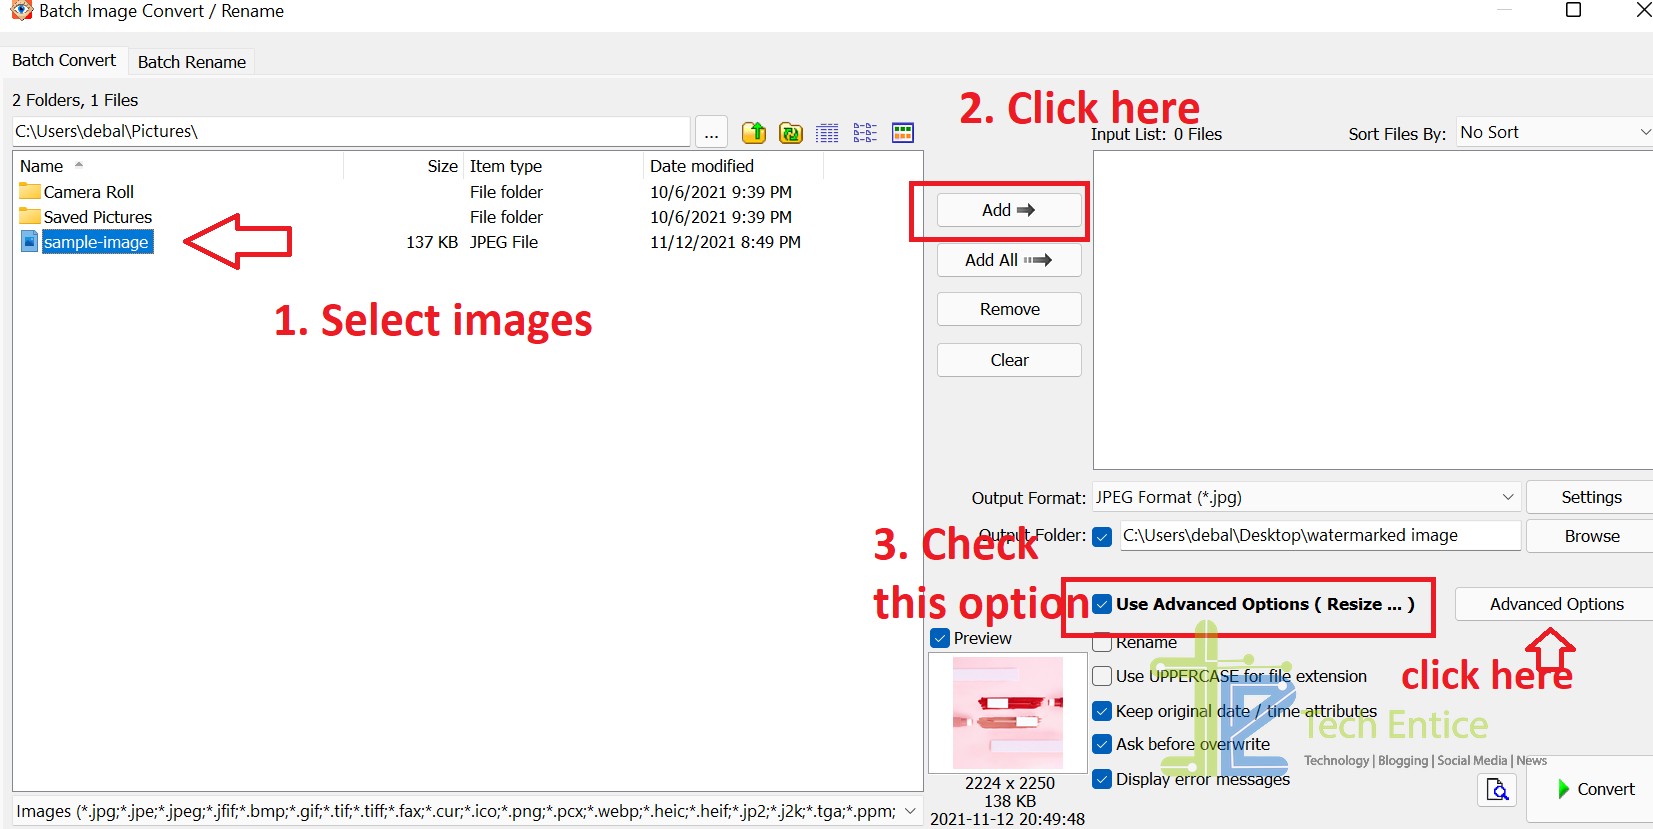
3. Next, select the images you want to convert, and click on Add. Then, check the box beside Use Advanced Options and click Advanced Options.

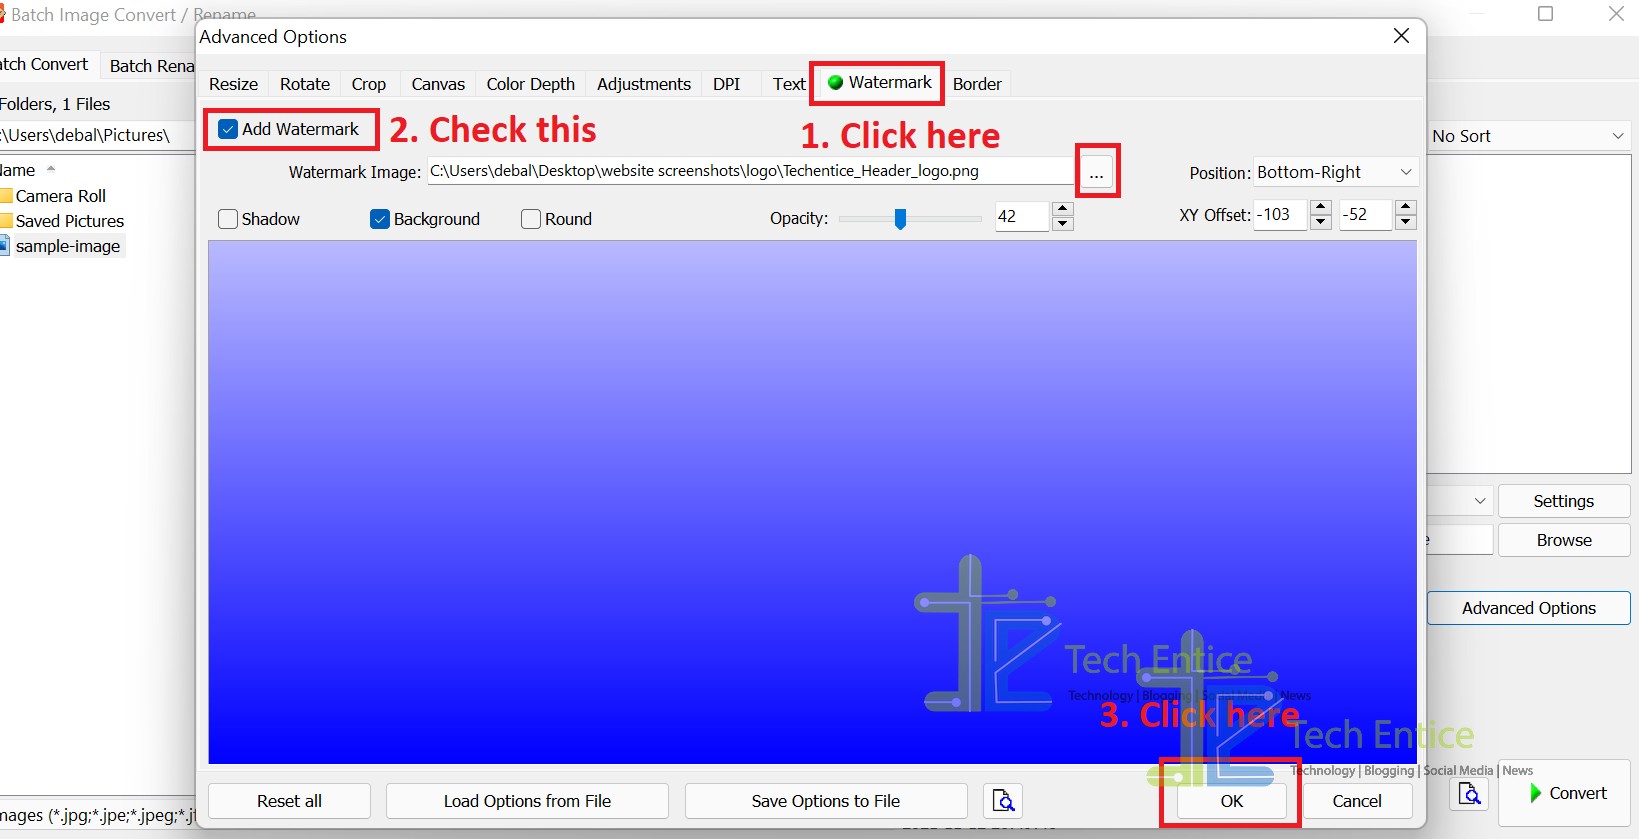
4. Now, go to the Watermark tab, and click on the box beside Add Watermark. Now click on the three dots as marked in the screenshot below, to find the location where you have saved the watermark. Find the image, double click and load it. Click OK.

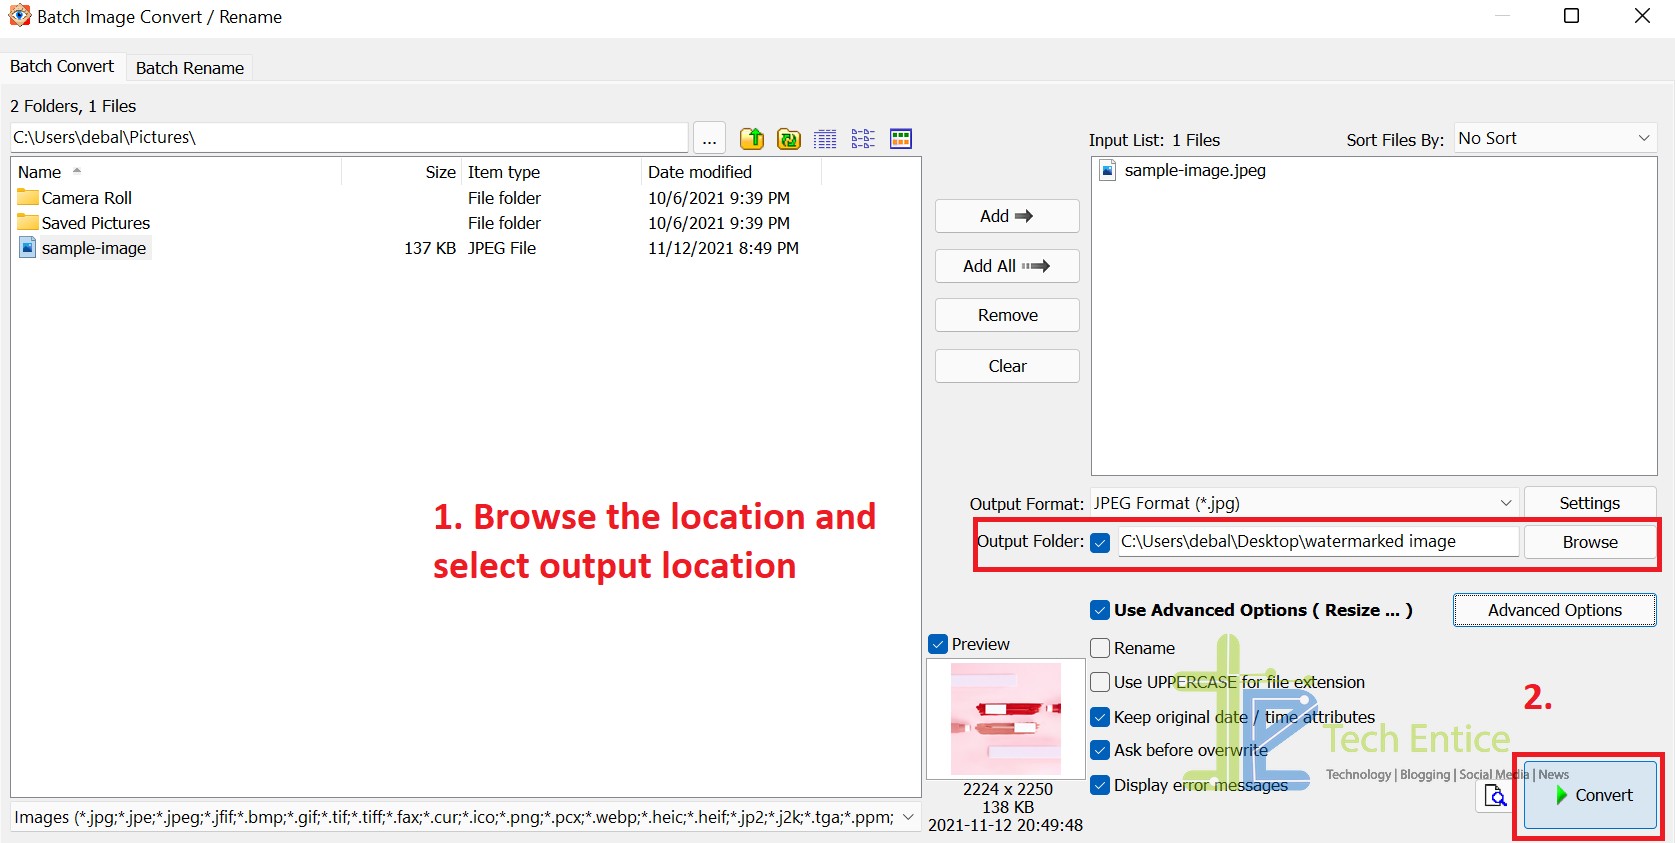
5. Select the output folder where the watermarked images will be saved. Finally click Convert.

You are done. That’s all!

