


You may already know how to take screen or a portion of the screen in Mac OS X. You can press ⌘,Shift,3 keys to capture the entire screen or ⌘,Shift,4 to capture a rectangular portion of the screen. By default the screenshots will be stored as .png files. But you can easily change the default settings anytime and can save the screenshots as .jpg, .pdf, .gif or .tiff file format. Here, first we have changed the default settings to save the screenshots as .pdf files later we have changed it to .jpg.
As per your requirements you may change the default format anytime:
.jpg/.png: Suitable for web uploads or for using in blog posts.
.gif: Because of the lowest size on disk, it’s suitable as resources of .css files (as it can reduce the loading time of a website).
.tiff: Suitable for Printing.
.pdf: Suitable when you are capturing Web pages, rich-documents, Capturing applications like Numbers, Pages.
Steps capture screenshot as PDF or JPEG in Mac OS X
1. Open Terminal: While you are in Finder press Shift,⌘,A to open Applications and then click on Terminal. You can also open Launchpad and search for Terminal.
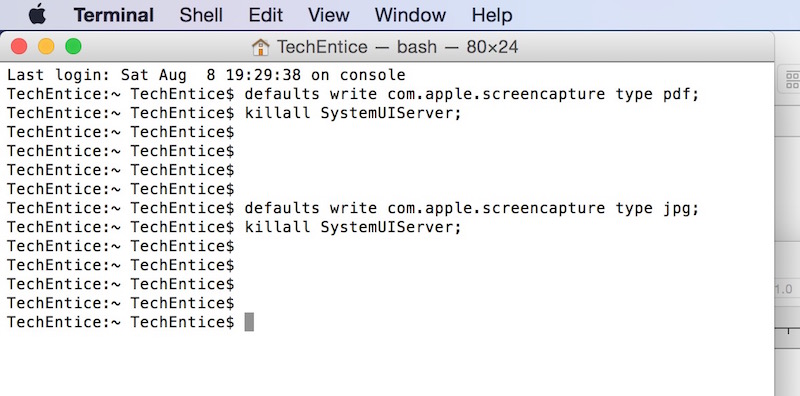
2. Now in terminal run below commands to change the screen-capture format to .pdf.
defaults write com.apple.screencapture type pdf;

killall SystemUIServer;
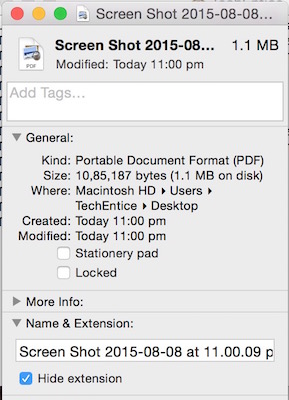
Now take screenshot by pressing ⌘,Shift,3 or ⌘,Shift,4, you will find that the screenshot has been saved as a .pdf file.

run below commands to change the screen-capture format to JPEG.
defaults write com.apple.screencapture type jpg;

killall SystemUIServer;

The process is same for .gif, .tiff or to revert back to default .png. That’s it.

