Whenever you upgrade your iOS, or insert a new SIM with a different network carrier, your iOS device such as an iPhone or iPad needs to download the updated version of the carrier settings. Carrier Settings are an important aspect of any smartphone as it contains all important technical settings required for calling, messaging and internetworking. When your iOS upgrades, the carrier settings must also upgrade in compliance with the new iOS version. Otherwise, users may find difficulty in connecting to the internet, or browsing websites. While some users may fail to connect to the internet, some could not make VoLTE and Wi-Fi Calls. Many users using iPhone XS, XS Max and XR, after activating eSIM, may face issues in browsing certain websites (popular websites like Google, YouTube, Facebook are opening, but other websites are not opening, which is a DNS issue) while using their physical SIM (second SIM) internet connection. The error can vary from user to user. The main reason for all the above-mentioned problems is one, carrier settings not downloaded correctly.
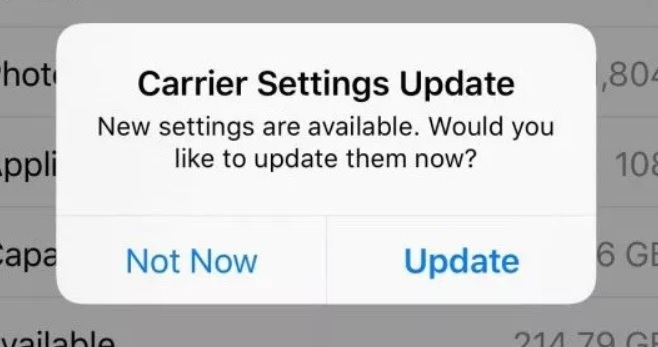
In general, when you connect to a new SIM, or upgrade your iOS, carrier settings will offer you the update automatically. You do not need to do anything. The notification appears and all you need to do is tap on the “Update” option. If you accidentally choose “Not Now”, then also, you may face similar issues. When you update, there will be no visible change in the interface. But if you have chosen “Not Now” by mistake or the update is not coming to you automatically, then you need to manually download the Carrier Settings.
In this article, we shall discuss some plausible iPhone Xs Max Repair resolutions for solving the issues.
Steps To Manually Update The Carrier Settings On iOS Device
The first resolution is to manually update the carrier Settings. For that first open your Settings application.
Next, go to General.

Now, click on About.
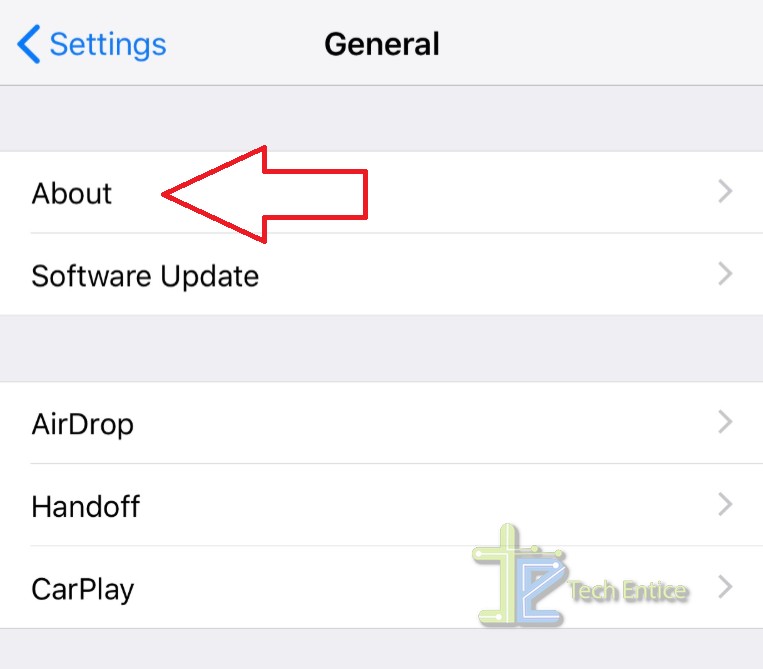
As the About section opens, scroll down and find out the Carrier option. There will be two Carrier options, one for the eSIM and the other one for the secondary or physical SIM. If an update is available and you have not availed it, then you will get a notification.
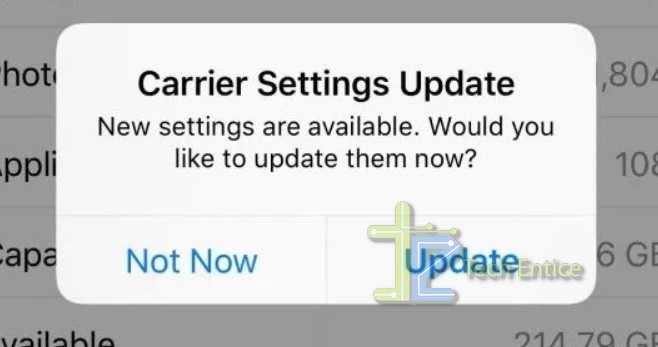
The carrier settings update option will automatically pop up. Simply, click on “Update”. And you are done.
Steps To Update Carrier Settings With iTunes
You have to connect your iOS device to your PC, Windows or Mac. Your PC must have iTunes installed. Now, you have to open iTunes. iTunes will prompt you to download or update the Carrier Settings. First, it will ask you “iTunes need to check for an update to the carrier settings on your iPhone”. Tap on the Check option.
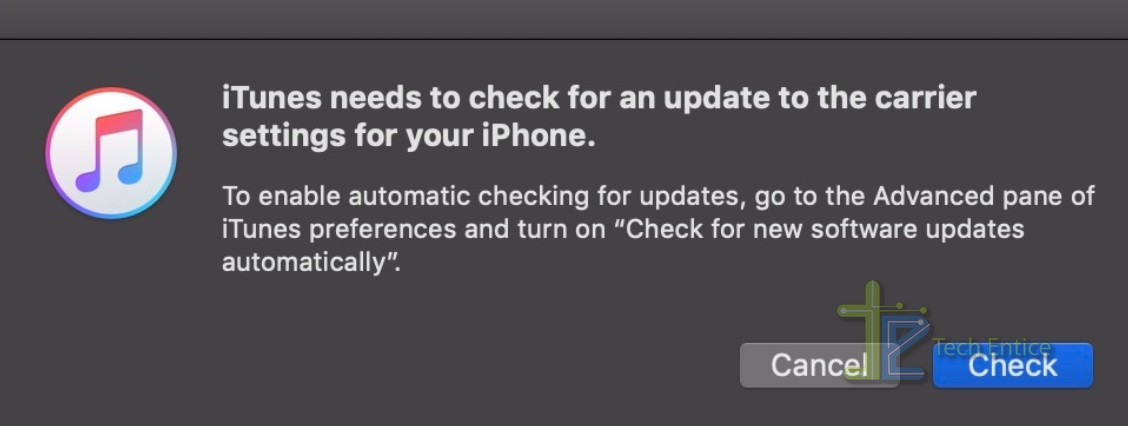
The carrier settings will bbe updated and downloaded automatically. That’s all!
If all these steps fail to update your Carrier Settings, then the last resort will be contacting to your carrier provider and Apple to solve the issue. But the first two options will essentially solve your problem.