Everybody’s got a wireless network at home, but if you’ve ever wanted to get your iPod touch, iPhone, or other wireless device connected. Your laptop should previously have a wireless card which should not be connected to any other network.
To transform your Windows 7 laptop into a wireless hotspot, you need to know the network and sharing settings of Windows 7. But before that let us know a little more about Wireless Hotspot.
Wireless Hotspot is a term used for a device which acts as a wifi router for all the other devices within its range, using laptop as a wireless hotspot you can access internet from your mobile device( if it has wifi ), from another laptop or any other device which uses a Wifi connection. You have to just connect the primary laptop to a net connection such as a dongle or wired LAN connection.
Steps to transform laptop into a wireless hotspot in Windows 7
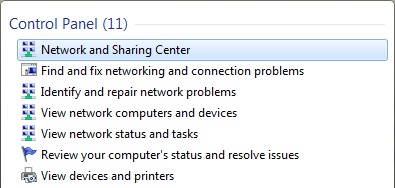
1. Go to start and type network and sharing center and press enter.
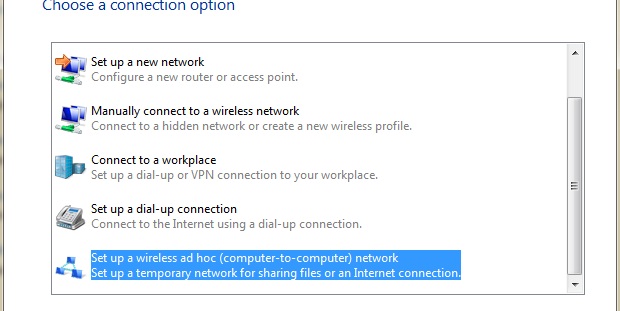
2. Choose setup a new connection or network.

3. Choose the type as “a wireless adhoc(computer to computer) network”.
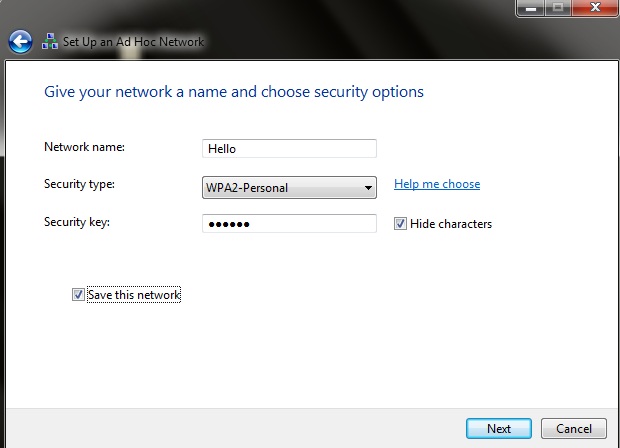
4. Click on next and then give your network a name so that it is clearly distinguishable from other networks. Give a password also if you want the adhoc network to be secure.
5. Now on clicking the network icon on the task bar you will see the following things.
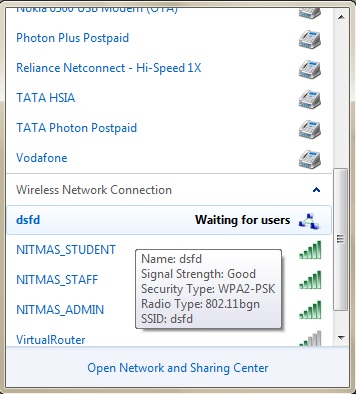
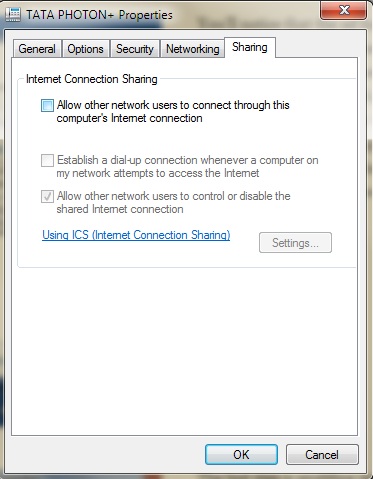
6. Right click on the network you have formed and click on its properties. Under the sharing tab select the check box for sharing to allow users to connect through the same network as shown.
7. Now it’s done. Your laptop has turned into a hotspot through which any wire-less device can connect to the internet wireless through the wire-less adhoc network.